
At some point there will be an Arduino project that is just too good to take apart. You can’t leave it on the breadboard forever, but building a circuit on prototyping board can be confusing for beginners.
The best way to make this process easier is to plan the layout of your circuit before you start building. I used to use graph paper to do this, but then I found a great free tool called DIY-LC.
DIY-LC is designed primarily for DIY guitar effects circuits, but it is a great general purpose layout tool for planning circuits. It supports many different types of board, including stripboard (Vero Board), breadboards, perf-board and tri-pad board. The component list is nowhere near as diverse as Eagle, but you can customise the basic components to match their sizes and values to the ones you are using. You can also create custom-sized DIP chips, so you can represent everything from the lowly 555 all the way up to a Zilog Z80 and beyond. Any component that isn’t in the pre-defined list can be easily represented by the shape tools.
The interface is easy to use – much easier to learn than Eagle. Once it is installed you can pretty much dive in and create a layout with no prior knowledge of the program. Double clicking on any component or object lets you change its properties such as colour, value or size. The tabbed layout of the component toolbox is easy to navigate too.
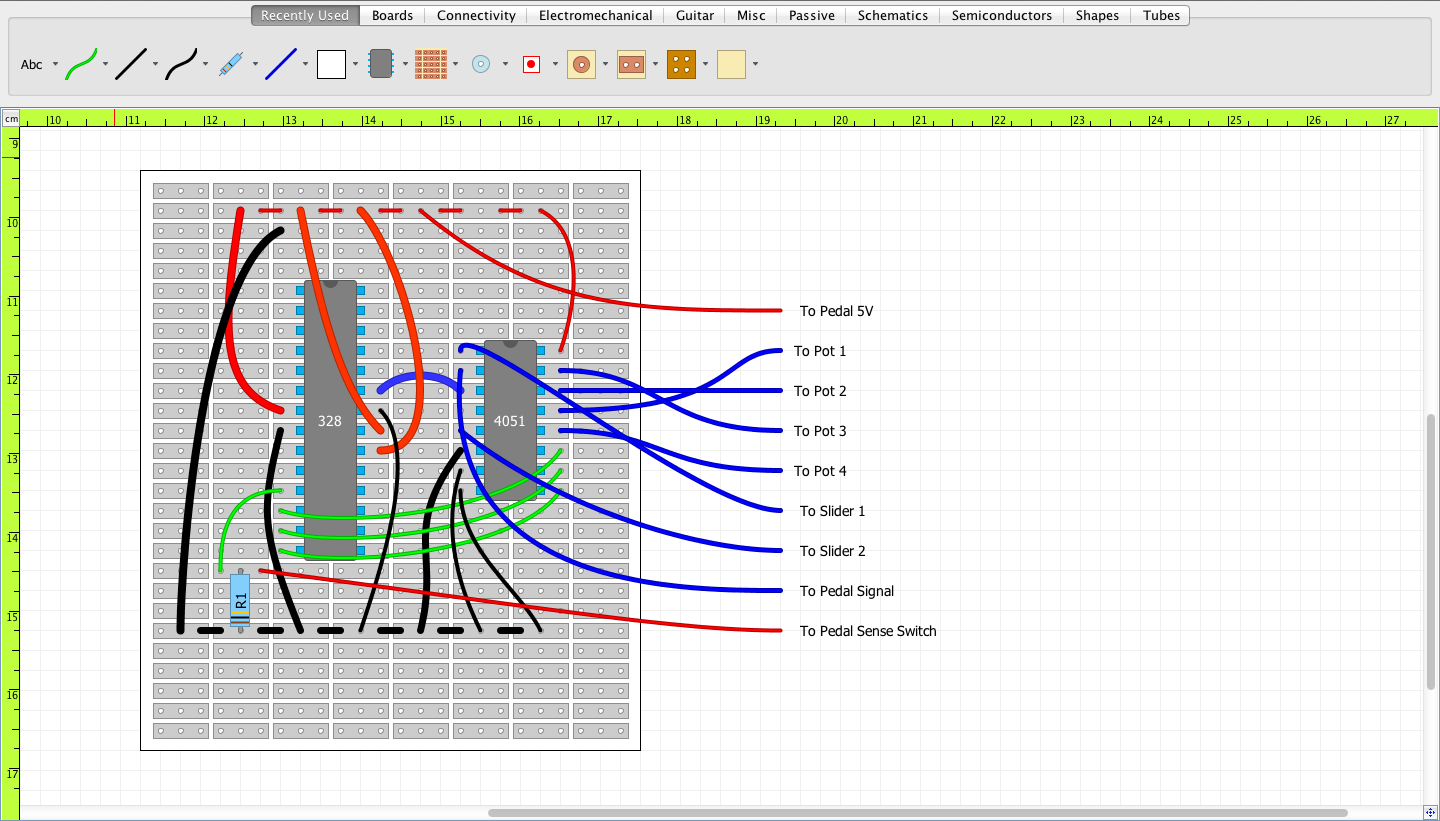
Here’s a snapshot of something I’ve been working on today. It’s not finished, but it only took me 15 minutes to get to this point.
DIY-LC works with Windows, OS X and Linux. You can download it here:
Leave a Reply